

All month I have been searching the internet for the perfect Kimono, but was not satisfied with what I found so I decided to make my own. Click read more to find out how to do this.


1. Fold material as shown below, so there is one fold on the right side and two folds on the top.
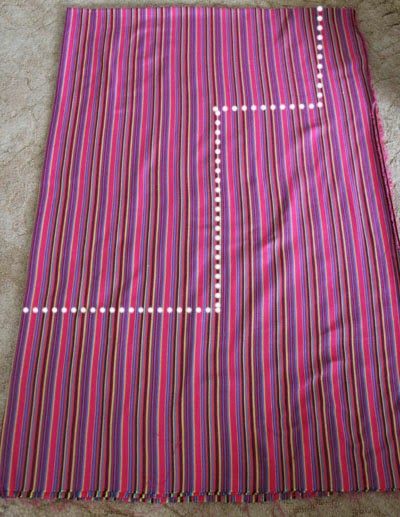
2. When putting your measurements down on the material mark them with pins. Once ready for cutting the pins should be in the shape of the white dotted lines below.
3. Once cut, lay out fabric as shown below, making sure it is inside out, and begin sewing (in a straight stitch) along the dotted lines shown below.

4. Once you have sewn that you can move onto creating the opening for the Kimono. This is simple, all you have to do is cut a straight line up the middle of ONE side of the material and then ending it is a triangle. (Shown below.)

5. Once this is cut, double fold edges and stitch all together.
6. When finished with this all you have to do is add the tassels of your choice to the bottom hem and arm holes AND you're done!
How did I style them?
 |
| LEFT: As white shirt // Karen Walker necklace // Zimmermann Shorts // Floral Kimono // Windsorsmith shoes // RIGHT: Ruby shirt // All about eve shorts // Kimono // Windsorsmith shoes // |

I hope you enjoyed this little tutorial.
xx
No comments:
Post a Comment